This post is by Danny Carlson, CEO of Kenij ROI.
Bullet points form a unique part of your Amazon listings. At first glance, they look like a simple way to highlight product features and squeeze in a few extra keywords. But there is actually a lot of nuance involved in writing great Amazon bullet points.
What key information should be in your bullets points instead of your title or description?
What’s the best balance between keyword optimization and sales copywriting?
How long should each bullet point be?
I’ll answer all those questions and more through my experience of creating more than 1300 listings for our clients at Kenji ROI.
The key ingredients of effective Amazon bullet points
I’ve spent four years crafting a unique process to maximize Amazon listing click-through and conversion rates.
From that process, I’ve discovered there are three things you need to work together for a truly optimized Amazon listing:
- Keyword Optimization
- Key Information Optimization
- Persuasive Design Optimization
Understanding these concepts is really important to writing great bullet points.
Keyword Optimization
You probably know that you need the right keywords in your listing to ensure the Amazon algorithm knows which searches your product is relevant to.
But you shouldn’t engage in “keyword stuffing” – packing in as many keywords as possible to try and gain an advantage in the search results, as this can create text that’s unreadable for people as a side-effect.
Here’s what keyword stuffing looks like in a listing title:
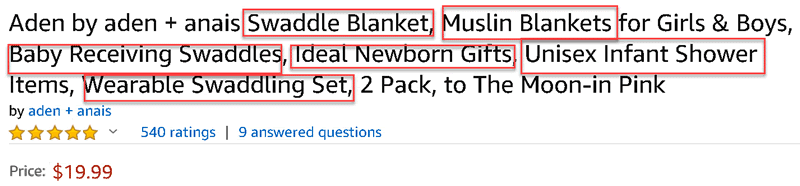
When it comes to your Amazon listing’s bullet points, they are actually one of the least important places to put keywords. If you fill them to their maximum character limit, only a small fraction of those keywords will be indexed by Amazon.
My advice is to have a maximum of two target keywords or phrases in each bullet point to allow plenty of space for the other types of optimization.
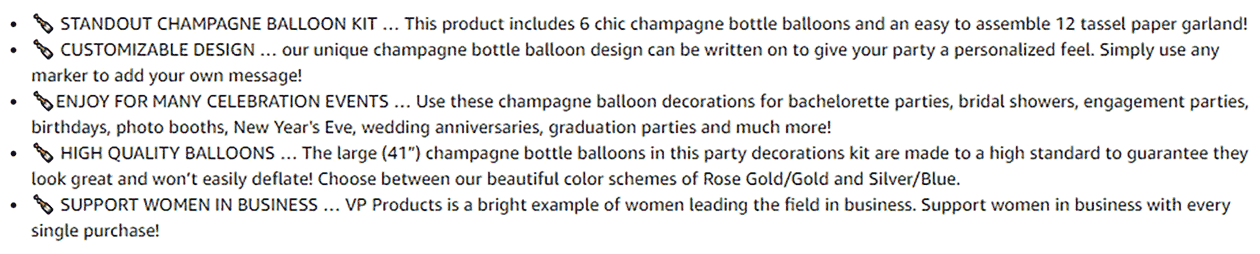
Here’s an example:
As you can see above, there’s around two key phrases per bullet. We aren’t going out of our way to stuff them in, but we are going back through after writing the bullets to make minor tweaks and make sure we have a few good keywords in there.
The Amazon search algorithm favors relevance more than volume, so it’s better to choose ten really targeted search phrases than cram in 50 and see the readability suffer.
In summary, you don’t want to completely ignore keyword optimization but it definitely shouldn’t be the main focus for your Amazon bullet points. Look at your title and description first and make bullet points the last priority for keywords.
Key Information Optimization
In a nutshell this is about identifying the most important product information and placing it in the right areas of your listing. For bullet points, the top two are the place to focus, as on mobile devices many Amazon listings only show two bullets without clicking “view more”.
Here’s how to choose the right product benefits to showcase in your bullet points:
- Do a massive amount of customer research. Look through your competitors’ Amazon listings and reviews and relevant Facebook Groups, and note down what other sellers are highlighting, what customers are saying about the products etc.
- From the data you have gathered, make a list of all the likes, dislikes, and trends.
- Start filtering the list, prioritizing benefits that you have seen mentioned a lot and cutting out comments that only came up a few times.
- Cut your list down to five benefits.
You should now have one key benefit to use for each bullet point. Each benefit will be turned into a “heading” for a bullet point.
Persuasive Desire Optimization
This is the final piece of our Amazon listing method. It comes last because it won’t be effective unless you are writing on a solid foundation – you need to make sure the benefits that you’re highlighting are the most important ones.
Here are a few key points to writing persuasive Amazon bullet points:
- Only mention product features AFTER you’ve mentioned the benefit it provides. For example, “HEAL YOUR GUT BACTERIA [benefit] – Our gut boosting formula is packed with the most essential probiotics [feature] for a healthy gut.”
- Keep each bullet point about one thing. It’s hard to persuade anyone of three things in a single bullet point. It will only dilute your message.
- Place the more aggressive claims at the end. According to the popular book on persuasion Win Bigly, humans are more likely to believe a questionable claim after hearing a series of more believable claims. Use this responsibly!
This is all about writing effective sales copy that converts shoppers into buyers. It’s about creating desire within the minds of your customers so they see your product as the bridge between their current undesirable situation, and their new, improved life after owning your product.
This is a very in-depth topic so I’ll simply point you to the most concise yet effective book I’ve ever read on sales copywriting, that can be completed in literally 15 minutes: This Book Will Teach You How to Write Better by Neville Medhora.
Once your bullet points are 100% optimized for persuasive desire and key information, then come back and see if you can make basic tweaks to add in some of your target keywords.
How long should you make your bullet points?
Longer isn’t always better, but neither is shorter. The sweet spot we’ve found is 170-200 characters per bullet point.
This works out to show up as two lines of text per bullet on desktop, and won’t turn into a giant blob of text on mobile.
Here is an example of Amazon bullet points that are too long and hard to read:
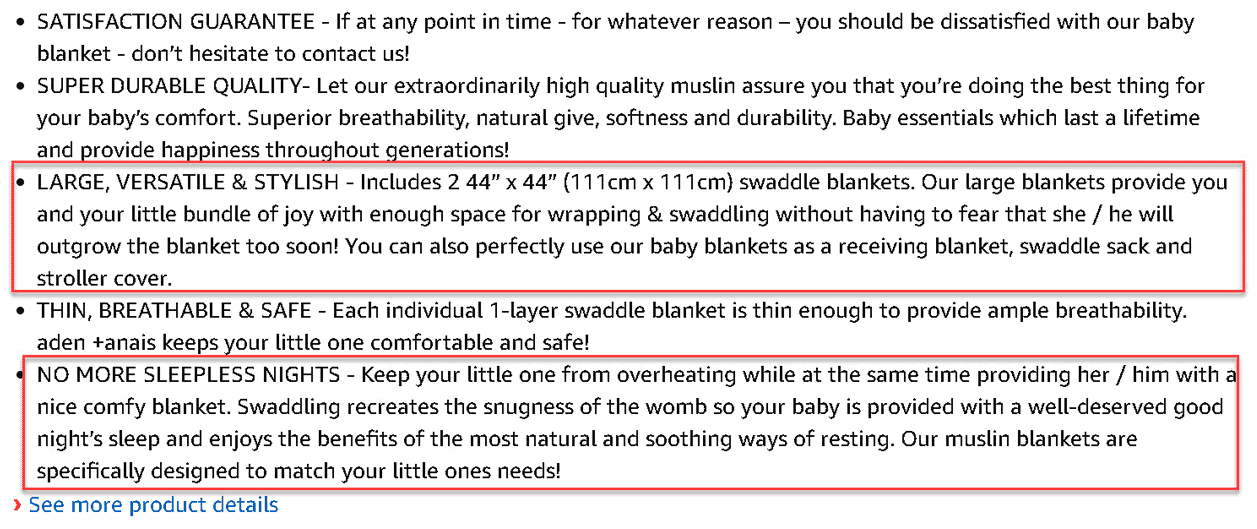
The 170-200 character constraint does make the bullet points more difficult to write, because you have to massage and rewrite each one to get the message across in the cleanest, most concise way possible.
I recommend writing, then rewriting each bullet point at least three times until you’ve landed on the punchiest way to communicate each benefit. Amazon is all about effective communication of key benefits, and keeping shoppers engaged on your listing instead of clicking to a competitor.
What do great Amazon listing bullet points look like?
The biggest mistake I see is Amazon sellers writing their bullet points backwards – they start by stating the feature, and then explain the benefit.
People buy to receive benefits, not features, so if you put the benefit at the start you are basically selling the shopper on reading the rest of your bullet point.
Here’s a structure we commonly use at Kenji ROI:
✓ BENEFIT DRIVEN HEADING … More details about the benefit. Now I’m going to explain how this product provides that benefit through one of the features!
Notice that it starts with a check mark. This is called an alt code symbol and you can just copy and paste them into your bullet points. Most of the simple alt codes will work in Amazon listings and easily make your bullet points stand out a bit more.
Also notice the heading in ALL CAPS at the beginning. This is the most effective way to make the topic of each bullet point clear so shoppers can easily scan and find the information that’s important to them. Amazon does not allow bold text in bullet points, so ALL CAPS is the best we can do here.
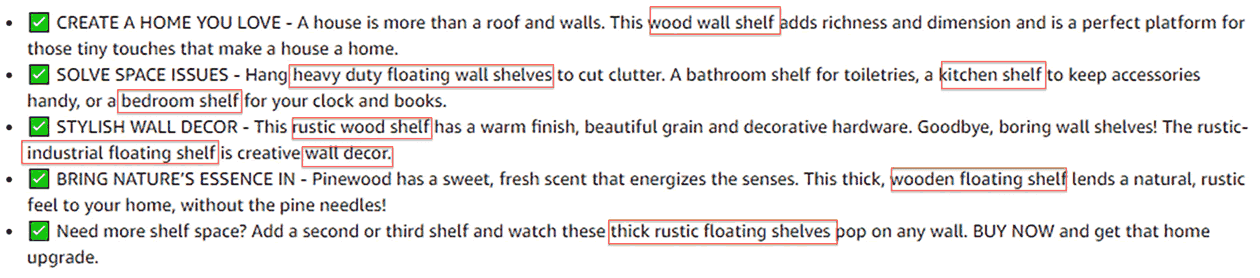
Here’s an example of using a BENEFIT DRIVEN HEADING in a way that stands out on Amazon.
Notice the difference that starting each bullet point with the benefit makes. If someone skims them, they will still understand the main benefits, and are infinitely more likely to read the rest.
Master the art of simplicity
Like so many things in business, writing great Amazon bullet points has a lot to do with keeping things simple. But simple and concise is actually more difficult to pull off than complex and verbose.
If you can master writing simple, concise and persuasive bullet points, following the guidelines I’ve laid out for you here, you’ll have a real edge over your competition. It may start as a 1% conversion rate advantage, but snowball to thousands of additional unit sales over months and years.
If you have any further questions about anything in this article, feel free to reach out to me in the comments or through the link below!
This post was by Danny Carlson, an Amazon FBA entrepreneur and founder of Amazon seller agency Kenji ROI, specializing in PPC management and listing optimization. Kenji ROI was founded in 2016 and now has a team of over 10 employees.
Danny is also host of the Actualize Freedom Podcast (about Amazon FBA) and the Danny Carlson Podcast (on building agencies, mindset, and lifestyle) completing more than 75 interviews with names like Daniel DiPiazza, Steve Sims, Manny Coats and Kevin King.

Leave a Reply